Showing posts with label diy. Show all posts
Showing posts with label diy. Show all posts
Wednesday, July 11, 2012
diy: burlap door hanger
My sis-in-law and bro-in-law are expecting their second baby and until last week we didn't know if Baby 2 was a boy or a girl. (If the suspense is killing you... IT'S A BOY!) They shared the exciting news at the lake while the fam was all together. I wanted to have a special little gift for them to open if the baby was a boy, and of course, if it happened to be a girl. After visiting what seemed like every baby store in Nashville I came up empty handed.

Friday, May 11, 2012
b&a: guest bedroom dresser
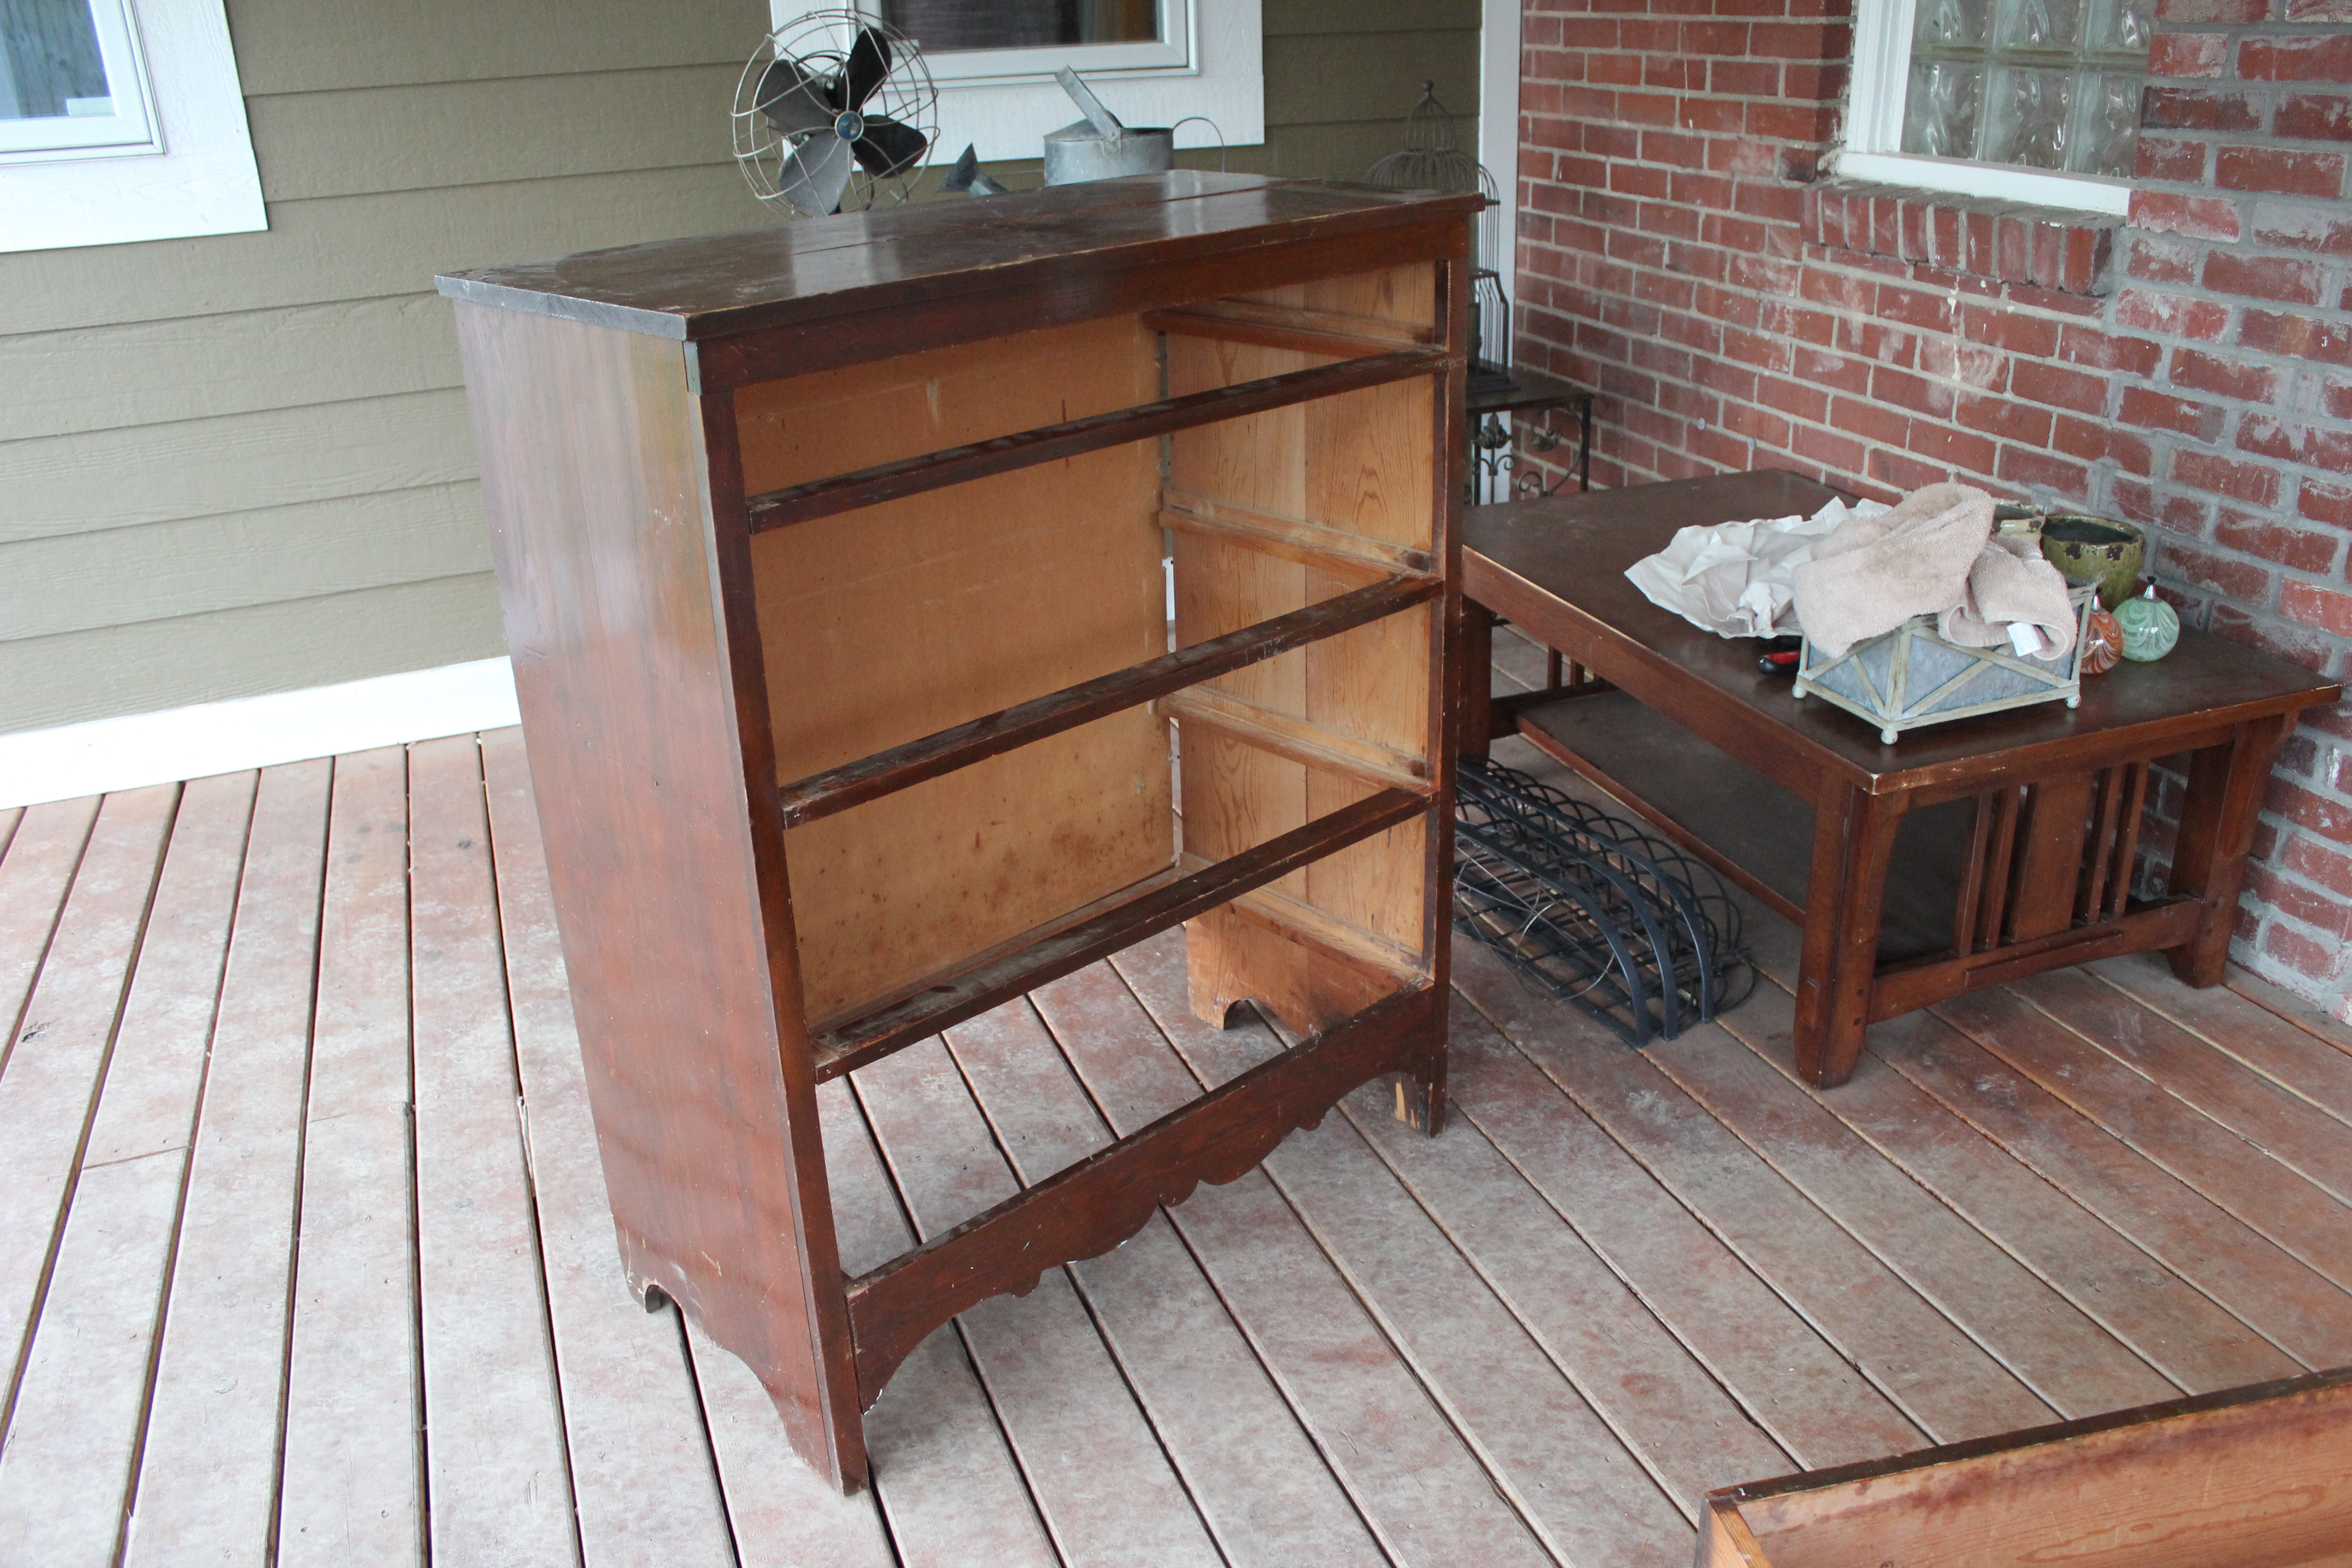

This post is LONG overdue, but... I bought this ugly thing off Craigslist about a year ago. BW reluctantly accompanied me to a very sketchy storage unit where we met a one armed man (seriously) who was thrilled for us to take it off his hands...er, hand? Either way. I had no place to put it, but at $40 it was such a bargain I couldn't pass it up. It sat in my sunroom untouched until, ironically, it found it's way into another storage unit. Several months and a new city later, it finally has a home. We needed a dresser for our guest bedroom and this puppy fit the bill. But before it could make it's way in to Kendall... it needed some help.
SIDE NOTE: How cool is that fan in the background? It was in the attic when we moved in and I made BW lug it down stairs. It weights close to 30 lbs. and it must be at least 50 years old. And it still works!
1. It was covered in the most disgusting red candle wax. No clue how/why that happened, but with little bit of elbow grease I was able to scrape it all away.

2. The back of the dresser (basically a sheet of pressboard) was practically falling off. I didn't get a picture, but it didn't take long for BW to tackle that one. With some new screws we were back in business.

{ I put BW to work while I was busy snapping pictures }
3. These awful (almost as awful as my manicure - or lack thereof - in this picture), dirty plastic pulls. Which I quickly swapped out for some pretty ones purchased for 50% off at Hobby Lobby.

4. It needed paint. Bad.
I was very eager to use my Annie Sloan chalk paint, which I actually ordered back when I bought the dresser. It too has been sitting in the storage unit. So much for completely projects in a timely manor. The beauty of chalk paint is that it doesn't require priming or sanding, which is an idea I can get behind because it means quick and easy. After filling in the extra holes left from the old drawer pulls with a little wood putty and sanding to make sure everything was nice and smooth, the whole dresser got one coat of paint. It wasn't quite the coverage I was hoping for, so I opted for a second coat.*
I sanded it at the corners and edges to give it a distressed look. I decided not the paint the top of the dresser. I just liked the look of the natural wood against the blueish green color. We popped on the new knobs and voila!


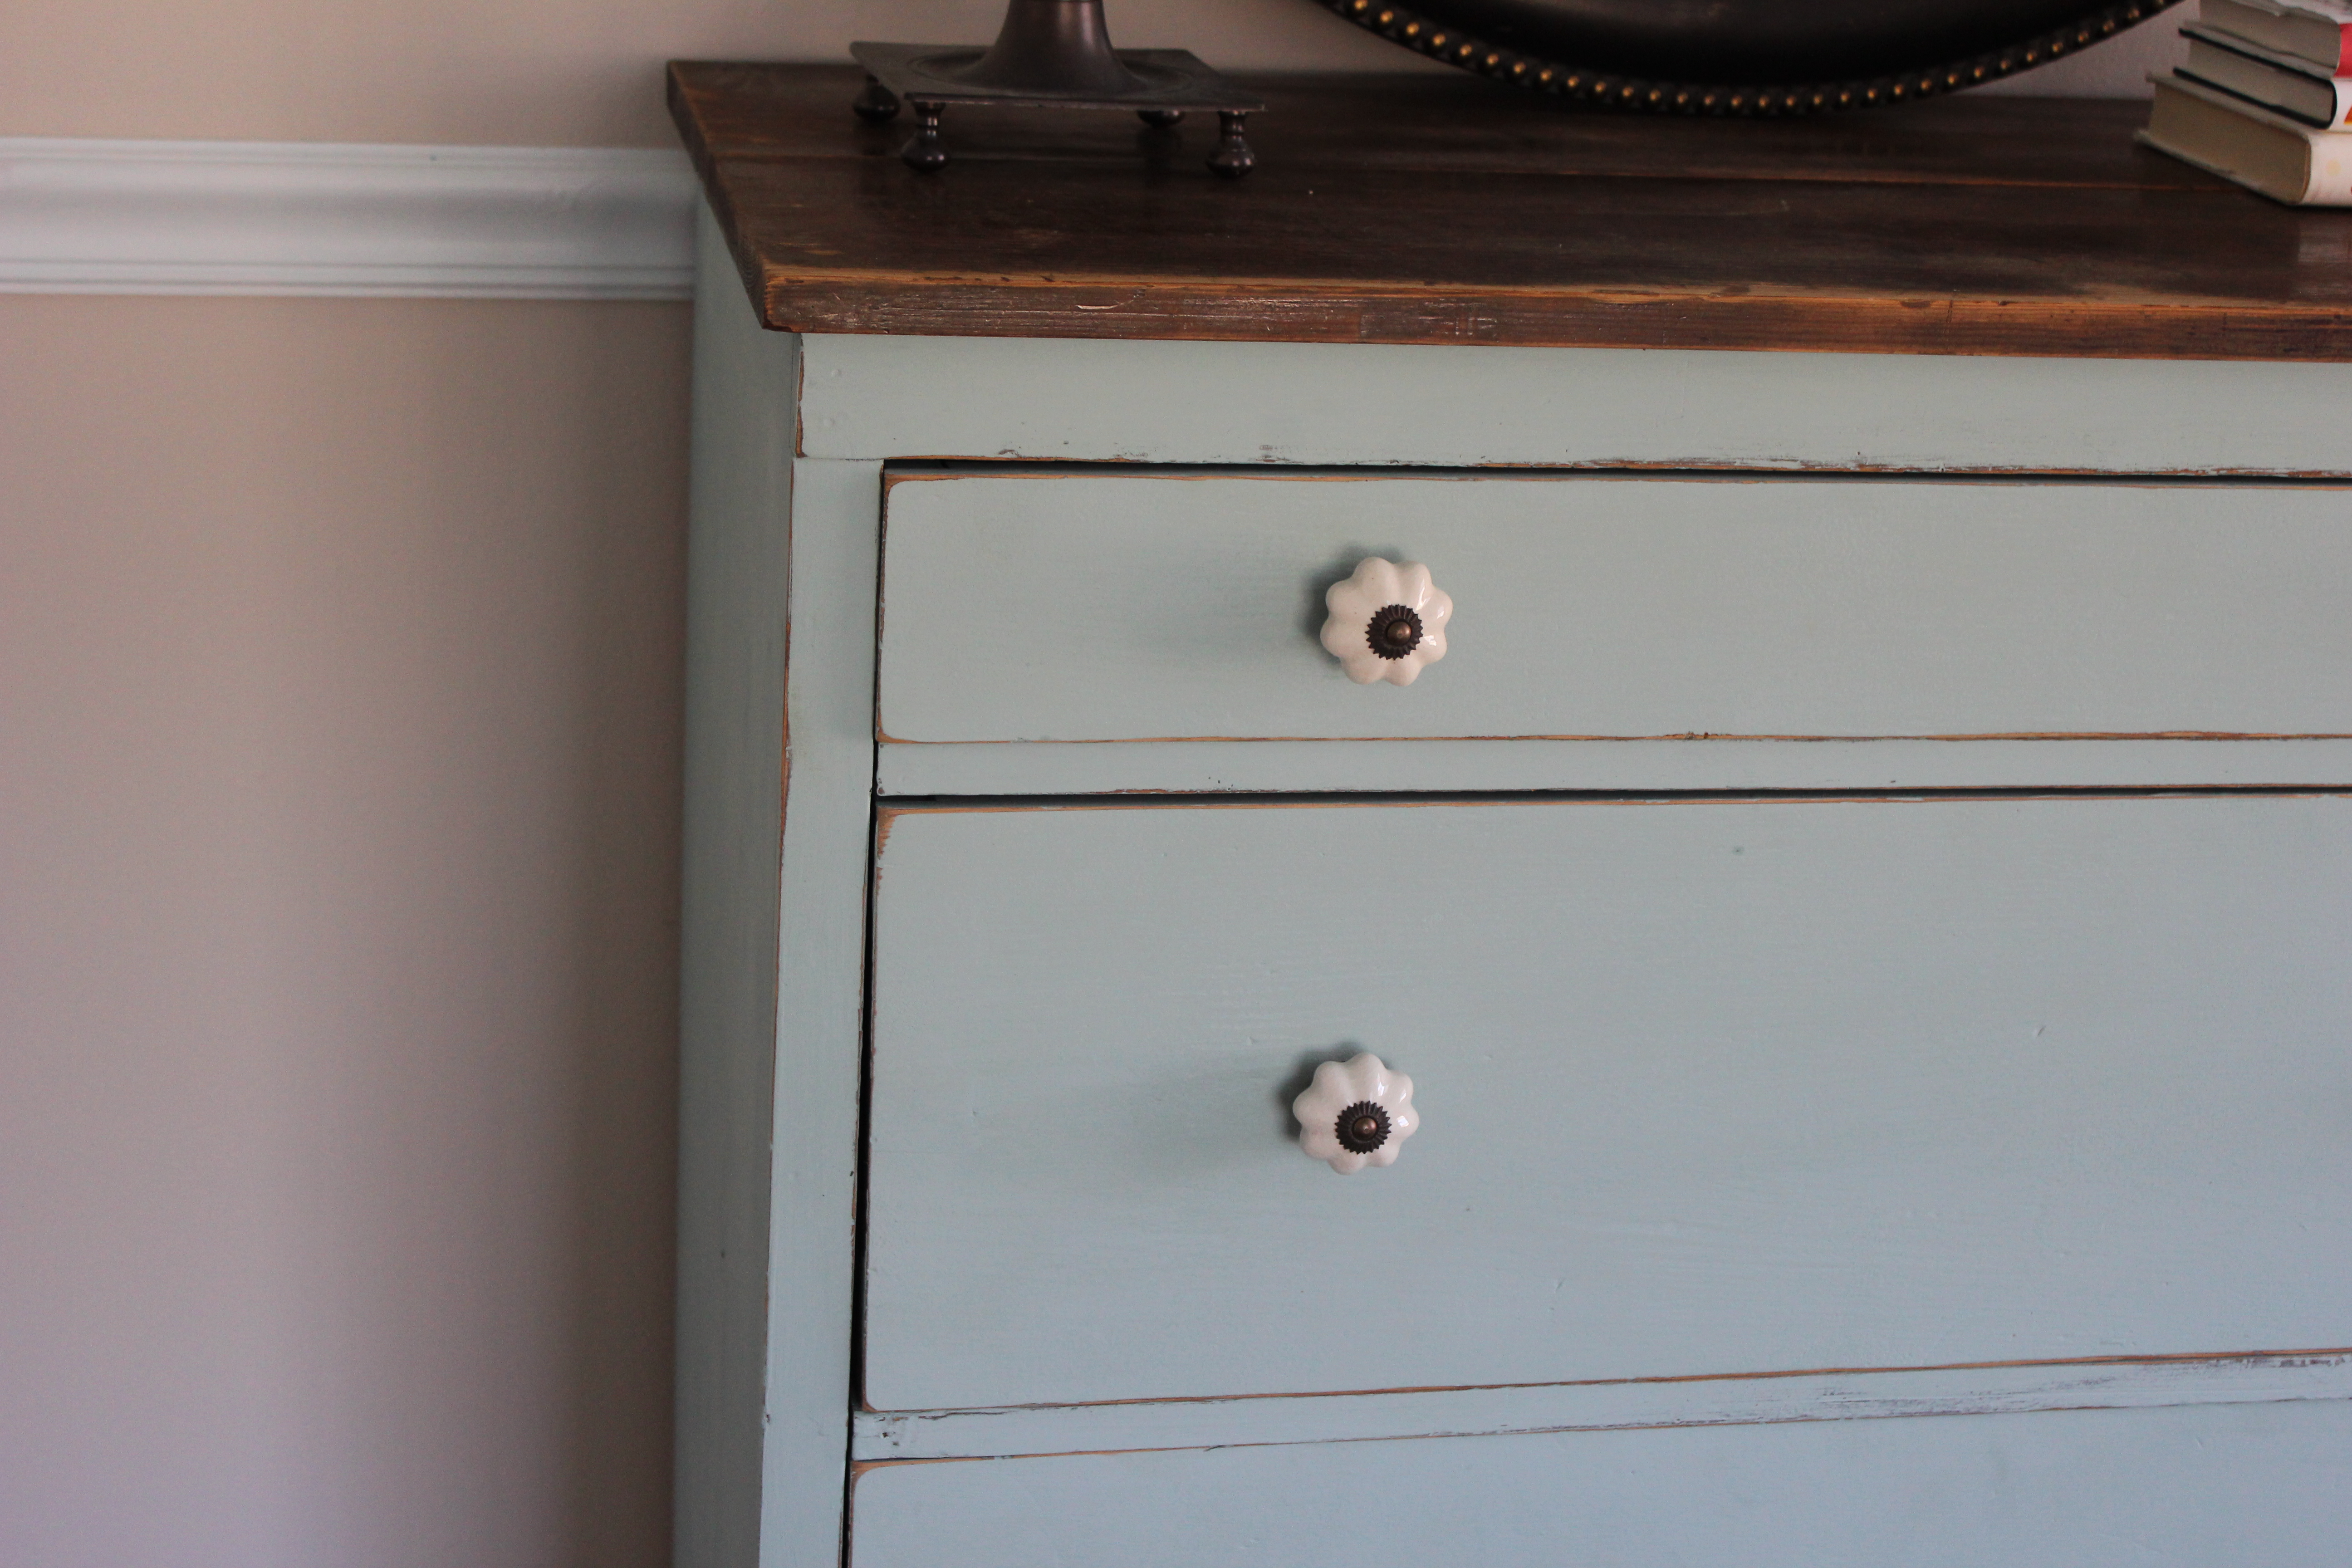
*The first coat went on nice and smooth, however the second coat seemed to go on a little thick. After some sanding it turned out just fine. I was planning on using chalk paint to paint our kitchen cabinets (another project for another day), but after using it on the dresser I definitely think I will take the 'ole paint and prime route. I am just looking for a cleaner, smoother, as little brush strokes as possible finish on the cabinets.
Oh and also, just about everything I've read about chalk paint says that you need to finish it off with wax. I have yet to do that. I was too eager to get it back inside. But
Thursday, January 19, 2012
giving tree
Although the holidays have come and gone, I thought I would share this idea for an easy DIY hostess gift that can really be given during any time of the year. I whipped these up as a hostess gift for a wedding shower we had in early December, but like mentioned, who wouldn't want to receive no matter the time of year? I used a rosemary tree, but during the warmer months you could swap rosemary for basil or another herb.
{ what you'll need }
If your plant is wrapped in paper, use your scissors to trim the paper to the top of the pot. I did not want to remove it completely, because I did not want any moisture to soak through to the burlap.
Cut a square of burlap large enough to wrap around the pot.
Wrap burlap around pot and push the upholstery pins in to the soil to secure the burlap. This is crucial to make the burlap look pretty! Without the pins it just ended up looking like a big wadded mess.
Secure with a ribbon and personalized tag and voila! What I love most about this gift is it's something the receiver can use - it looks perfect sitting on a windowsill and they can pinch off a little bit and toss in to their cooking. You could even include a delicious recipe using the herb.
{ what you'll need }
- 1 potted herb
- burlap
- ribbon
- gift tags
- upholstery "t" pins
- scissors
If your plant is wrapped in paper, use your scissors to trim the paper to the top of the pot. I did not want to remove it completely, because I did not want any moisture to soak through to the burlap.
Cut a square of burlap large enough to wrap around the pot.
Wrap burlap around pot and push the upholstery pins in to the soil to secure the burlap. This is crucial to make the burlap look pretty! Without the pins it just ended up looking like a big wadded mess.
Secure with a ribbon and personalized tag and voila! What I love most about this gift is it's something the receiver can use - it looks perfect sitting on a windowsill and they can pinch off a little bit and toss in to their cooking. You could even include a delicious recipe using the herb.
Subscribe to:
Posts (Atom)